A kitchen space is probably one of the most important spaces for a home and even more so for a community space. Its where family, friends and visitors spend quality time. For us its also a gathering place for sharing ideas, socialising and where our produce will be transformed into delicious, off-the-farm meals. So needless to say, the cooking stove is an important part of our farm.
So, how can we build kitchen stoves that promote community cooking, are super efficient, use less heat, provide more heat and don’t leave us stinking of smoke? Our awesome permaculture interns had the answer…”Lets build a Rocket Stove!!!” A Rocket Stove is mega efficient, really fun to build, it doesn’t cost the earth, can be built out of recycled materials and is a great activity for kids – especially if you’re planning to use and make your own mud mixture to build with like we did! (Tell them you’re building a rocket anything and they’ll be in!) If you already have a stove, consider building one of these for your outdoor space, bbqs, or a portable, down-sized one for camping. Just ensure, that if you build a bigger one its under a roof for rain protection.
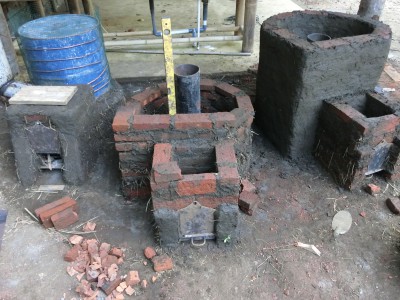
Brianna, our mega talented intern, made two rocket stove designs for the farm as an experiment to see which is better in terms of efficiency, practicality and cost and for educational purposes. We built two stoves of the 1st design, and 1 of the 2nd design. So far, its looking like Design 2 is going to work better. You’ll find out why in a minute..
Rocket Stove Design 1
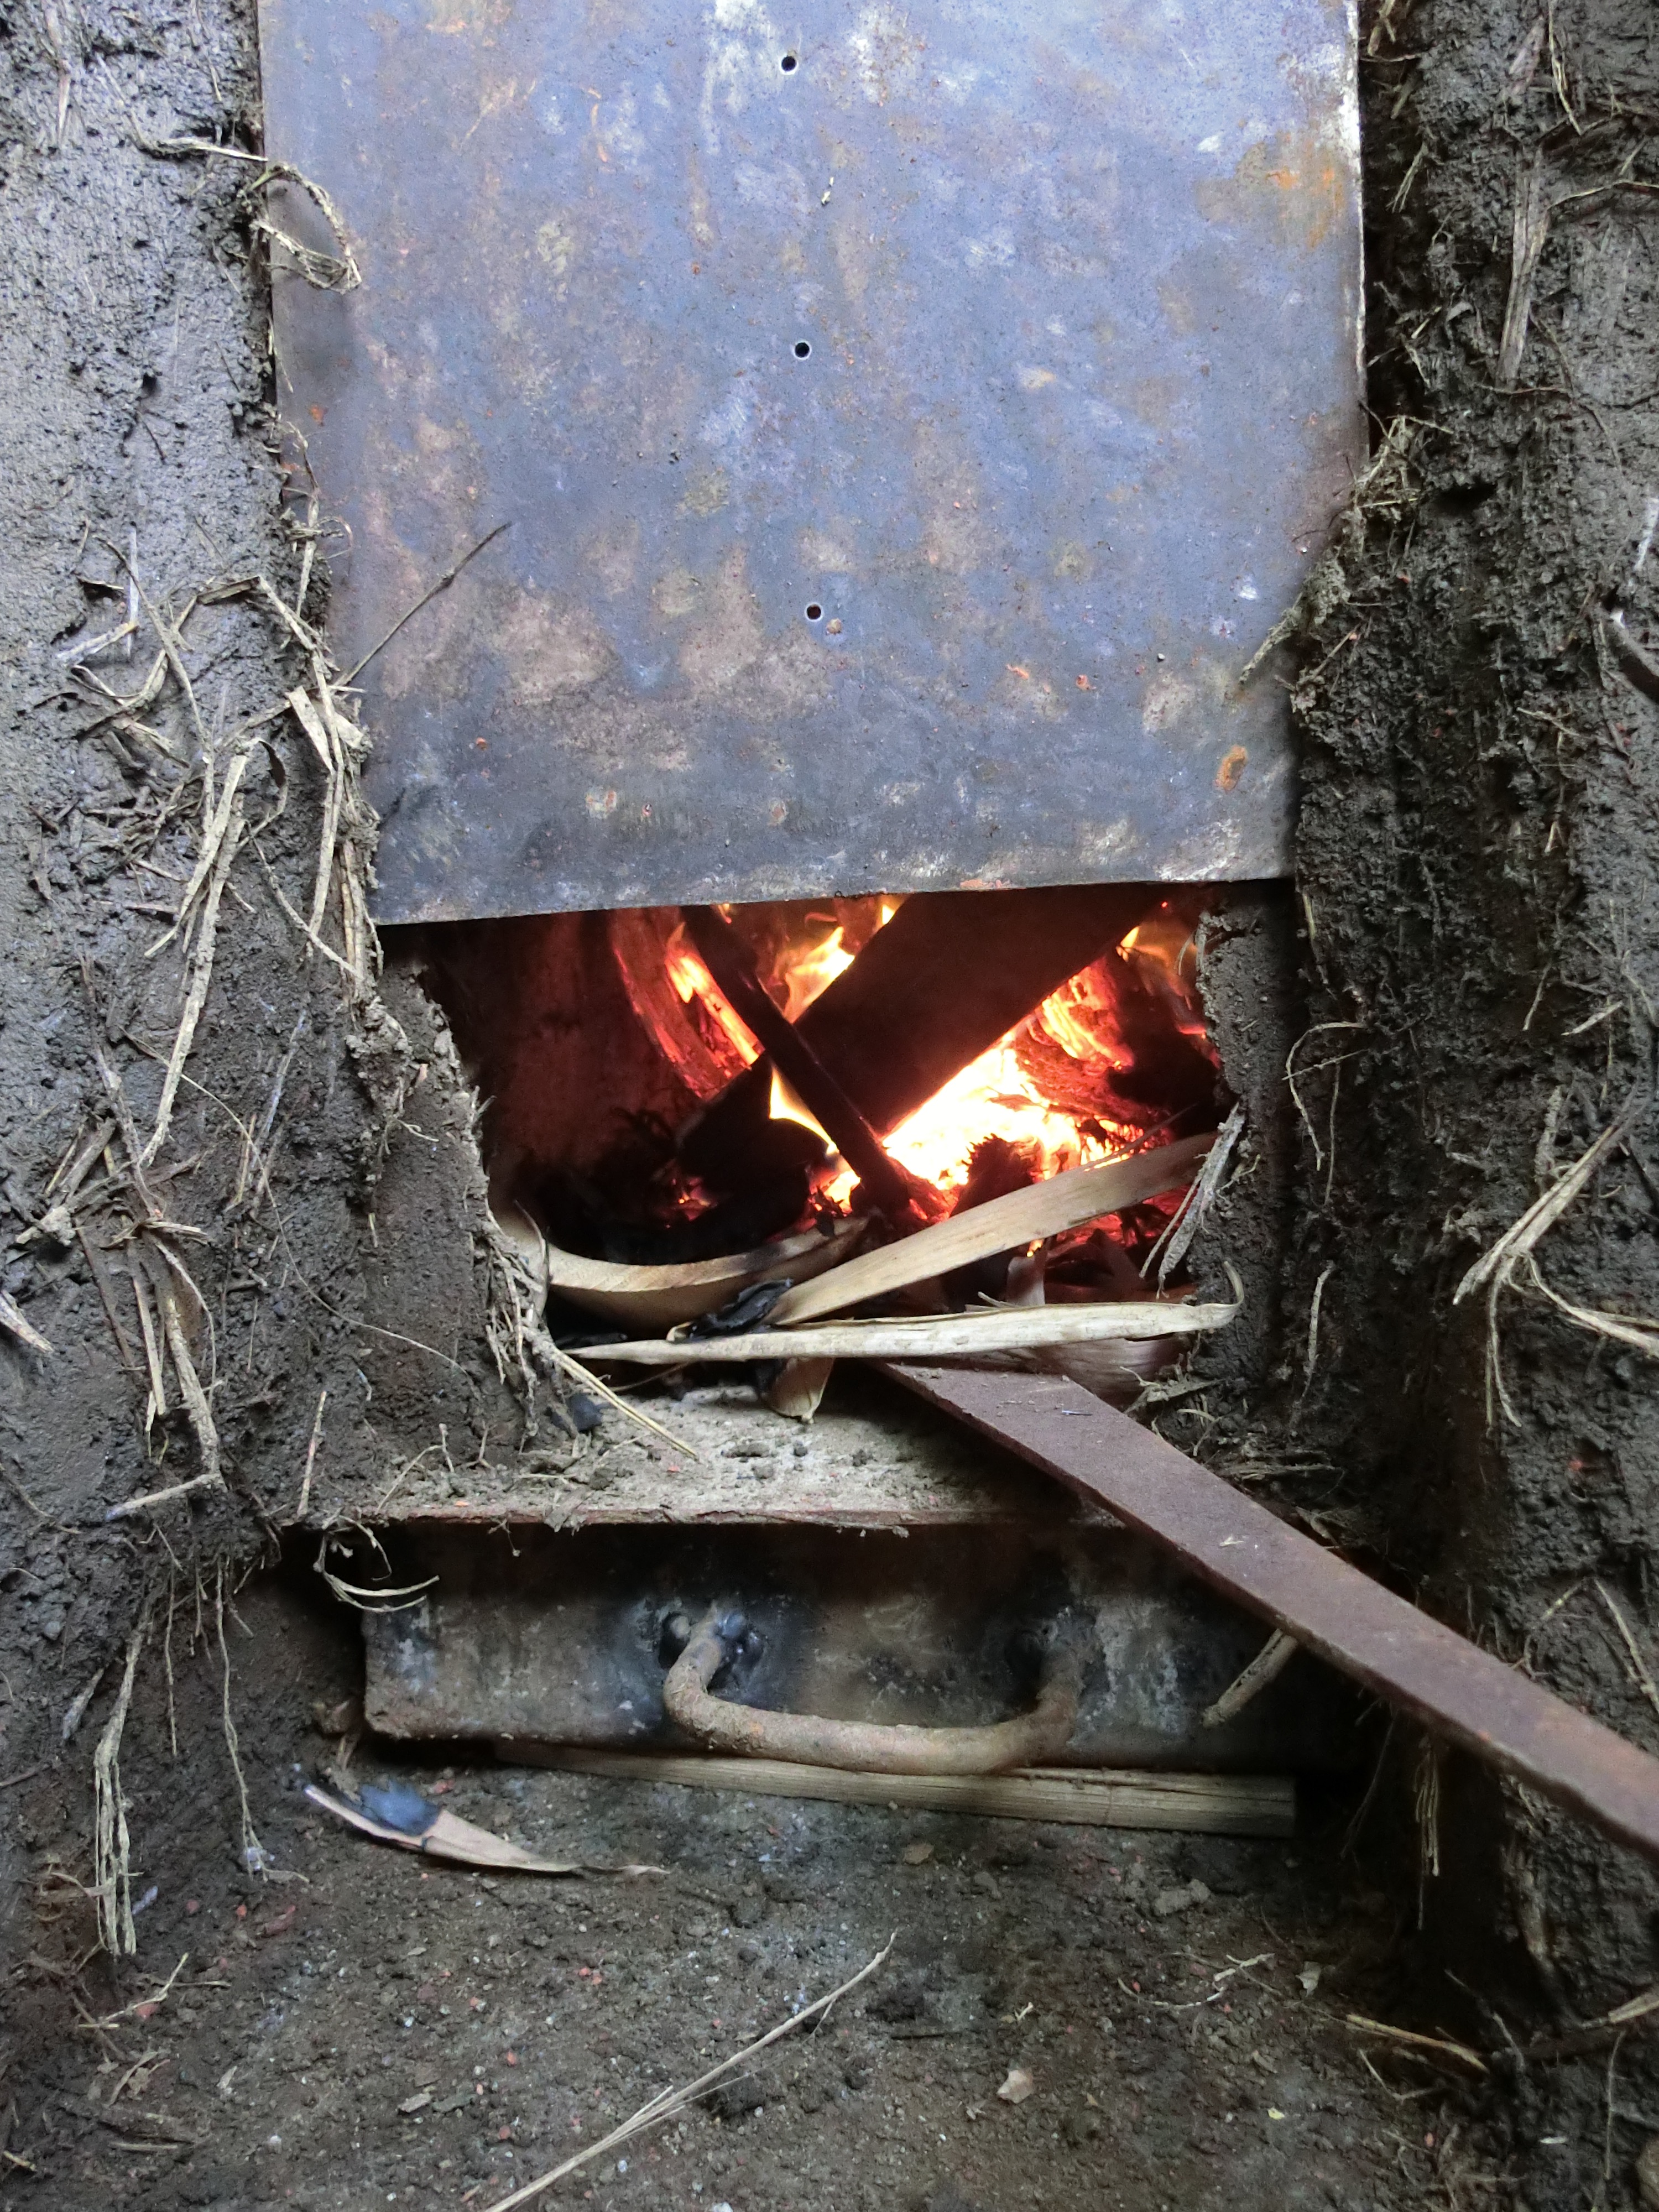
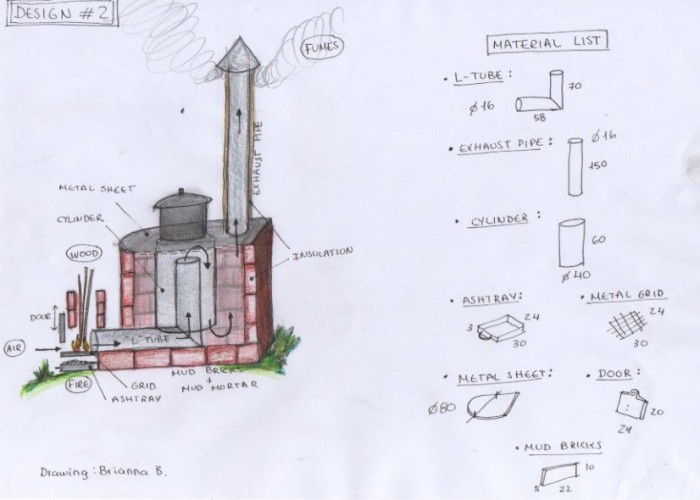
There are some elements of both designs that are the same. These include: a mud and brick foundation, a metal door to control air flow, an ashtray and metal grid which ensure the entry point doesn’t get clogged and an L tube. However, in this design we used a large metal barrel, which doubles as a cooking surface and insulation. We added an extra thin brick insulation layer to protect people from getting burnt whilst they’re cooking and we placed the exhaust pipe at the bottom of the barrel.
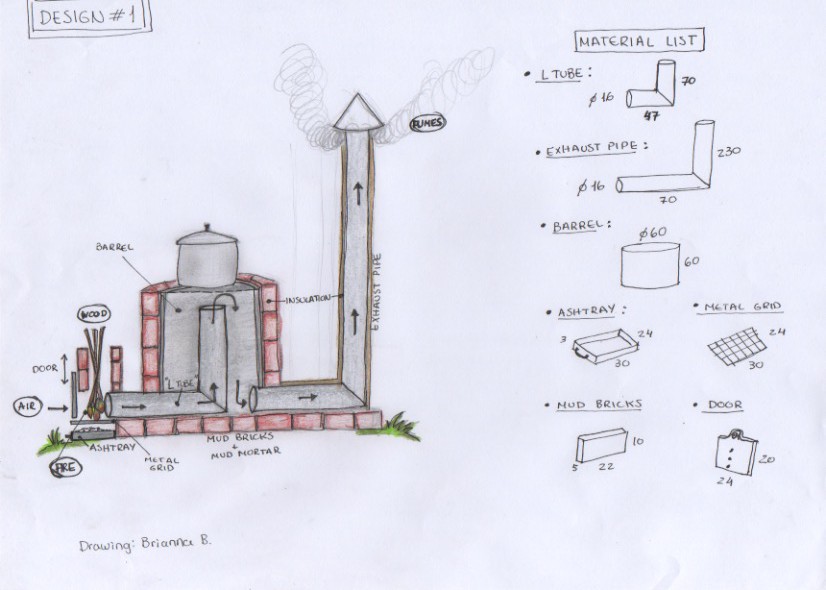 .
.Materials you need:
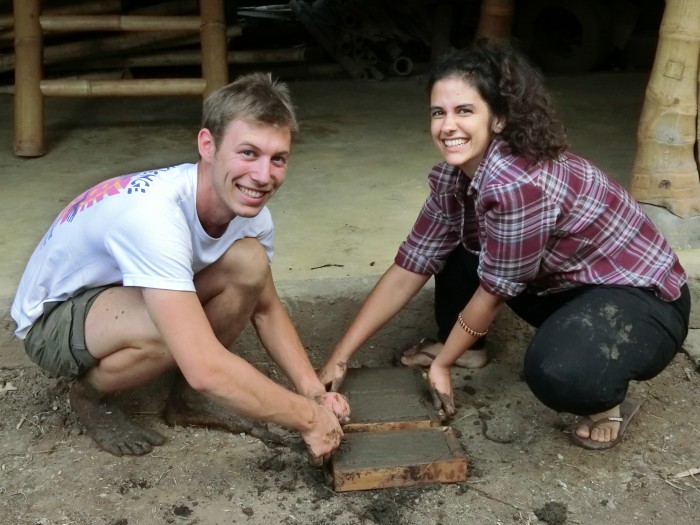
Soil, sand, straw, cow manure and clay to make your mud mortar, and if you’re ambitious your bricks too,
Adobe bricks (if you’re not feeling that ambitious),
Metal Barrel for cooking surface (its too late for us now, but I strongly suggest sanding off the paint before using it),
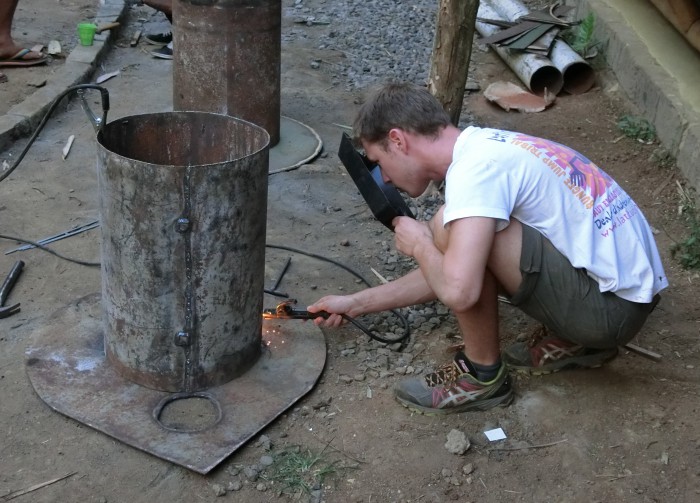
3 metal pipes- 2 for the L tube and 1 for the exhaust pipe (some welding will need to be done here),
Metal tray and metal grid (we welded scrap metal sheets to make the ashtray and small metal rods to make the grid).
Rocket Stove Design 2
In the second design we decided to use the metal bricks as the primary insulation, a smaller metal cylinder for concentrated heat in the centre and a seperate metal sheet as the cooking surface. In this case we will be welding the exhaust pipe onto the edge of cooking surface instead of at the bottom, so as not too lose excess heat. This design uses more bricks, but because the metal sheet is flatter than the cooking surface in the 1st design and the heat is more concentrated, we think it will end up being better to use.
Getting down and dirty
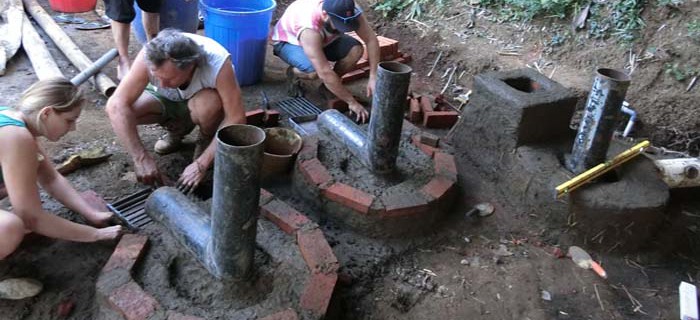
1. Source your metal, preferably from a scrap yard and send to a welder, or weld it yourself. Some bits will need a professional’s help.
2. Mix soil, sand and clay. Step, jump and dance on this mixture until it begins to combine. Tip: Break up your clay, add a little water and let it sit overnight before the big building day, this makes it easier for mixing, otherwise you’re in for a workout! Add the cow manure and straw gradually, in bucket size quantities. You will know the mixture is ready when you can roll it up in a ball, or when you step in the mixture barefoot you can see you toes.

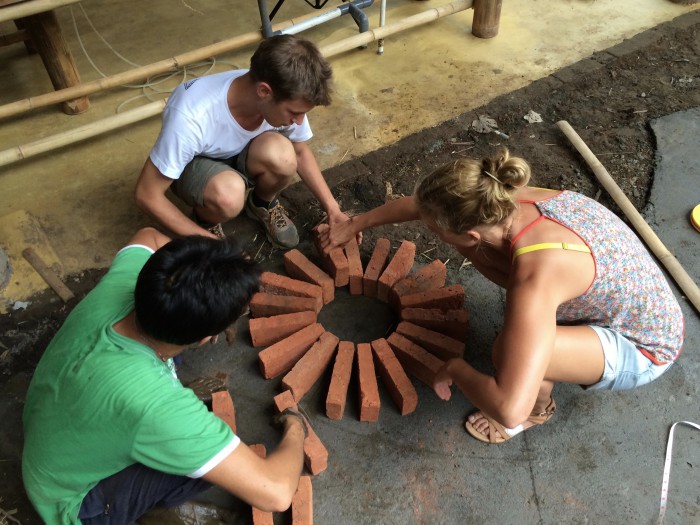
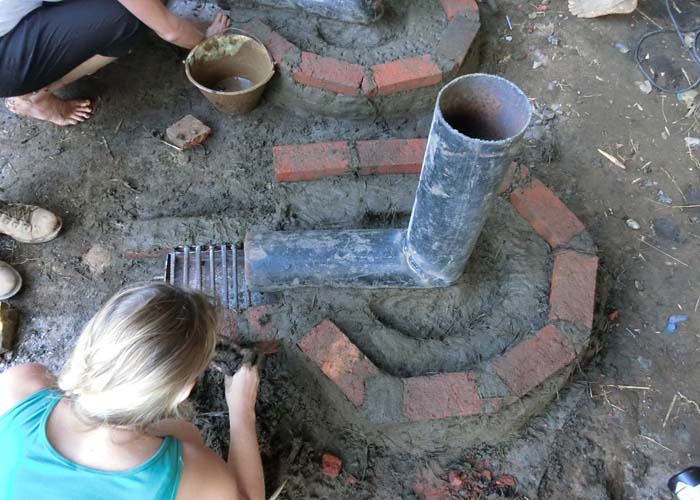
7. Lay the bricks with mud mortar in a square to create the fuel entry chamber. To this for both designs.
8. For design 2 add the exhaust pipe to the cooking surface/ metal sheet and weld it together.